
Custom Wardrobe Installation Process Explained
A wardrobe can look straightforward on paper, but the custom wardrobe installation process begins long before doors are fitted. The difference between a wardrobe that simply occupies a wall and one that makes a bedroom work harder is in the measuring, planning and preparation behind it. When every section is made for your room, awkward angles, sloping ceilings and uneven walls become details to design around rather than problems to hide.
For homeowners, the real benefit is not just more storage. It is waking up to a room that feels calmer, better organised and properly finished. Here is what a well-managed fitted wardrobe project should look like from first conversation to final adjustment.
It starts with how you use the room
Before measurements are taken, there needs to be a proper conversation about the room and the people using it. A couple sharing one wall of storage may need separate hanging areas and drawers. A child’s room may benefit from accessible shelves now, with enough flexibility to change as they grow. A compact main bedroom may need to accommodate clothes, bedding, luggage and everyday clutter without feeling crowded.
This is the stage to talk honestly about what is not working. Perhaps your freestanding wardrobe leaves a useless gap above it, perhaps the corner of the room is wasted, or perhaps sliding doors would give you more usable floor space than hinged doors. There is no single best layout. The right design depends on the room, your storage habits and the look you want to achieve.
A good designer will also consider practical details that are easy to miss: radiator positions, light switches, sockets, coving, skirting boards and access around the bed. These details influence the final design and help prevent surprises later.
The home survey turns ideas into accurate dimensions
A home survey is where broad ideas become a buildable plan. Walls in real homes are rarely perfectly straight, floors can run out slightly, and ceilings may dip or slope. Measuring only the width of a wall is not enough for a true fitted finish.
During the survey, the installer checks the full opening at several points, along with the depth available, ceiling height and any features that affect the wardrobe. Alcoves, chimney breasts, loft angles and boxed-in pipework can all be incorporated, provided they are accounted for from the start.
This is particularly valuable in older Essex homes, where rooms often have character but not necessarily square corners. Bespoke furniture is made to work with those conditions. Flat-pack furniture, by contrast, normally asks the room to work around standard sizes.
It is also the right time to confirm access. Larger panels and doors must be brought into the property safely, so staircases, landings and parking arrangements may need consideration. A professional team plans this before installation day rather than making it the customer’s problem on the morning.
Finalising the internal layout
The inside of the wardrobe deserves as much attention as the doors. Hanging rails are not all the same height: long dresses and coats need more clearance than shirts or folded trousers. Drawers are useful for smaller items, while adjustable shelving gives flexibility for changing needs.
Think about what you reach for every day. Frequently used clothes should sit between waist and eye level where possible. Seasonal items, spare duvets and cases can live in higher cupboards. If shoes are a frustration, dedicated lower shelves may be more useful than another deep drawer.
A tailored design can combine full-height hanging, double hanging, open shelving, drawers and overhead storage in proportions that make sense for your household. The aim is not to include every possible feature. It is to avoid paying for space that will not be useful.
Choosing doors, finishes and practical details
Door style has a big effect on both appearance and day-to-day use. Sliding doors are often a strong choice in tighter bedrooms because they do not swing into the room. Hinged doors allow the whole interior to be seen at once and can suit wider spaces or more traditional room styles.
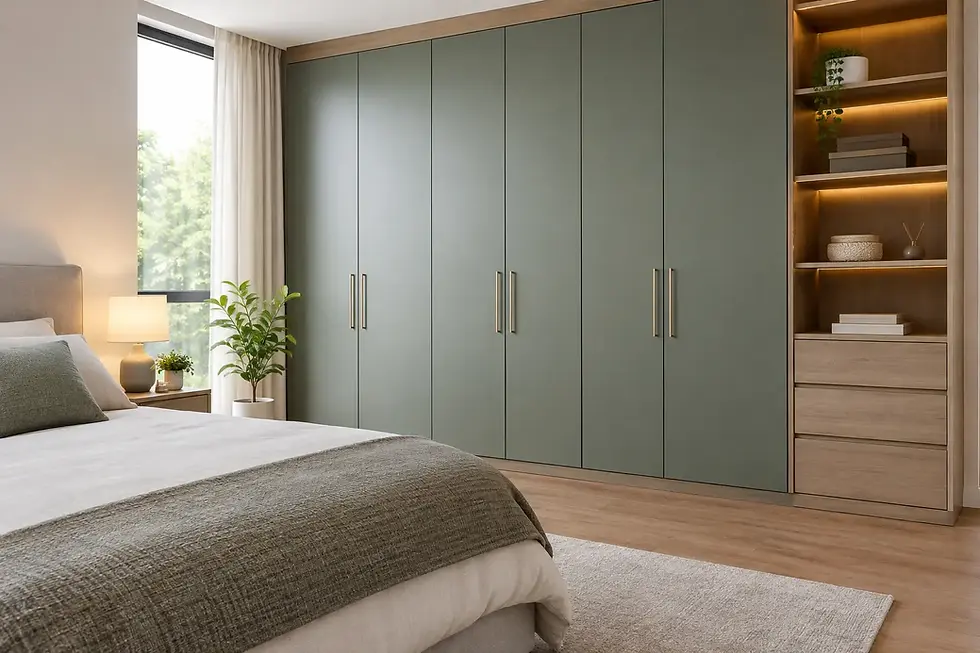
Finish matters too. A lighter tone can help a smaller bedroom feel more open, while wood-effect finishes can bring warmth and texture. Mirrored panels are practical for dressing and can reflect light around the room, although they will show fingerprints more readily in a busy family home. Glass, coloured panels and understated handles can all be used to match the wider décor rather than making the wardrobe feel like an afterthought.
This is where samples are helpful. A finish that looks right in a photograph can appear quite different beside your carpet, paint colour and natural light. Seeing materials in the actual room gives a more reliable basis for choosing.
Manufacturing comes after the design is agreed
Once the design, layout and finishes are confirmed, the wardrobe can be manufactured to the agreed measurements. This is a key part of the custom wardrobe installation process. It is not a case of selecting units from a warehouse and filling gaps with trim. Components are produced for the dimensions and specification of your project.
That does not mean every part must be unusual or complicated. Standard internal components can be sensible where they suit the design, while made-to-measure panels, fillers and doors create the fitted appearance. This balance helps deliver a polished result without adding unnecessary complexity.
At Slideaglide, design, manufacture and installation are managed as one connected service. That means the team fitting the wardrobe understands the decisions made at survey stage, including the small details that make the final result feel considered.
Preparing for installation day
Most installations are easier when the room is cleared as far as possible beforehand. Move clothing, freestanding furniture and valuables away from the working area, and make sure there is a clear route from the entrance to the room. If an existing wardrobe needs removing, establish in advance who will handle this and whether disposal is included.
There will be some practical noise from cutting, drilling and assembling components, though an experienced fitter will work carefully to keep disruption controlled. It is sensible to keep pets and young children away from the work area while tools and panels are in use.
Installation length depends on the scale and complexity of the design. A straightforward bedroom wardrobe may be fitted efficiently, while a larger run with multiple sections, angled ceilings or specialist finishes can take longer. The most useful approach is to ask what is realistic for your particular design rather than relying on a blanket timescale.
How the wardrobe is fitted
Installation normally starts with checking the space again and setting out the base. This matters because the carcasses must be level and aligned even if the floor is not. Fitters use careful packing and adjustment where needed so doors will run or close correctly once everything is in place.
The internal units are then assembled and secured, followed by shelves, rails, drawers and any fixed storage features. Panels are scribed and trimmed where necessary to follow the shape of walls and ceilings. This is one of the clearest differences between a fitted wardrobe and furniture pushed against a wall: the finishing pieces are shaped to remove distracting gaps.
Doors are fitted later in the process, once the structure is stable and square. Sliding doors need precise track alignment so they glide smoothly and meet neatly. Hinged doors need adjustment for even spacing and a consistent close. Small changes at this point make a visible difference, so it is worth taking the time to get them right.
The final checks are more than a quick look
Before the job is signed off, open every drawer, slide every door and check each rail and shelf. Doors should move freely, gaps should look even, and the wardrobe should feel solid. Protective coverings and installation debris should be removed so you can see the finished room properly.
Use this moment to ask any practical questions. You may want to know how to clean a particular finish, how much weight shelves can reasonably hold, or how to care for mirrored and glass panels. A fitted wardrobe is built for everyday use, but sensible care keeps it looking its best.
If something needs a minor adjustment after you have lived with the wardrobe for a few days, raise it promptly. A service-led local installer should want the final result to work as well in daily life as it did on the design drawing.
A fitted finish is built on careful decisions
The most successful wardrobes are not necessarily the largest or the most elaborate. They are the ones that solve the right problems: a cluttered bedroom, an unused alcove, a difficult ceiling line or a lack of space for two people’s belongings. Careful surveying, purposeful design and skilled fitting are what turn that plan into a wardrobe that belongs in the room.
When you are considering a bespoke wardrobe, bring a clear picture of how you live, not just how you want the doors to look. That gives the design the best possible starting point - and gives every inch of your bedroom a reason to work harder for you.


Comments